


Luxembourgguidelines.org – How To Change Border Color In Excel. Microsoft Excel is spreadsheet software that is used to carry out various tasks or work related to data, analysis and visual representation through tables and graphs. Then, there are various features that users can use, one of which is borders. Next, the border functions to add a line around a cell or range of cells as a differentiator or data separator. By using borders, users can increase the clarity of the Excel worksheet display and make it easier to read.
Besides that, Borders can be arranged in various types of lines, ranging from thick, thin, dotted, wavy and so on. In fact, it can be customized with colors and line styles based on the user’s preferences or presentation needs. This border feature is very useful in creating tables, graphs and reports that require a structured display. So, how do you change the border color in spreadsheet software? Come on, see the explanation in the article below.


How To Change Border Color In Excel
The following are the steps for changing the border color on the device, including:
Step 1: Select A Cell Or Range Of Cells
The first step you must take is to select the cell or range of cells whose border color you want to change. Then, you can do this by clicking and holding the mouse button while highlighting the cell or range of cells.
Step 2: Open The Format Cells Menu
After selecting a cell or range of cells, the next step is to open the “Format Cells” menu. Then, you can do this by right-clicking on the selected cell or range of cells. After that, select the “Format Cells” option from the menu that will appear.
Step 3: Select The Border Tab
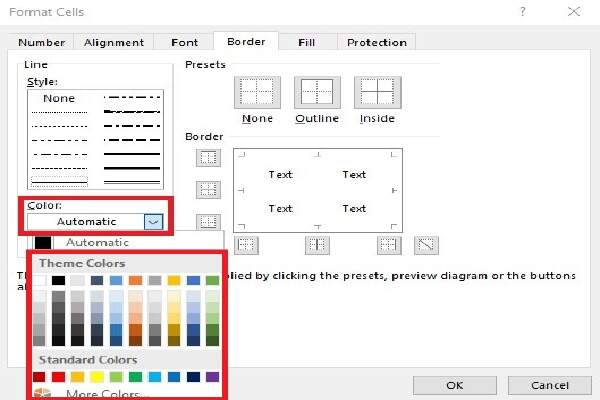
Once the “Format Cells” window opens, select the “Border” tab at the top of the window. Then, on this tab there are various options for setting the border around the selected cell or range of cells.
Step 4: Change Border Color
Under the “Border” tab, you will see various options for changing the border, starting from the line type, color, and line thickness. To change the border color, you can follow these steps:
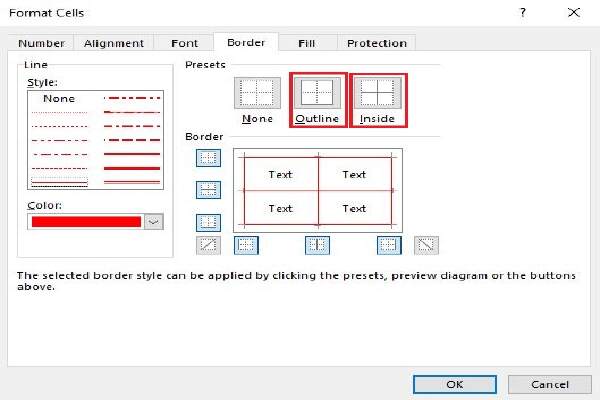
- First, you can select the type of border whose color you want to change. For example: Selecting “Outline” to change the border color for a range of cells or certain sides to change the color separately.
- Second, you can choose a new color for the border. Then, click on the color box that corresponds to the side of the border whose color you want to change. After that, select the desired color from the color palette that appears.
- Third, you can click the “OK” button at the bottom of the “Format Cells” window to apply the changes.
Step 5: Check The Results
After successfully applying the border color change, you can check the results on the Excel worksheet. Then, make sure the border color has changed as desired.
That is an interesting explanation about how to change border color in Excel which can be conveyed in the article above. Hopefully this article can be useful for readers.