


Move Rows in Excel – You might need to move rows and columns in the dataset from time to time when dealing with data in Excel. For instance, I wish to immediately move the highlighted row to the top of the dataset below. Do you now intend to duplicate this row, place it where you desire it, and then delete it? If so, then it is one approach to go about this. However, there is a technique to shift rows and columns in Excel that is much faster.
In this article, I’ll demonstrate a fantastic shortcut you can use to quickly change rows and columns in Excel.

Also Read : How To Hack Free Fire Diamond
Move Rows in Excel
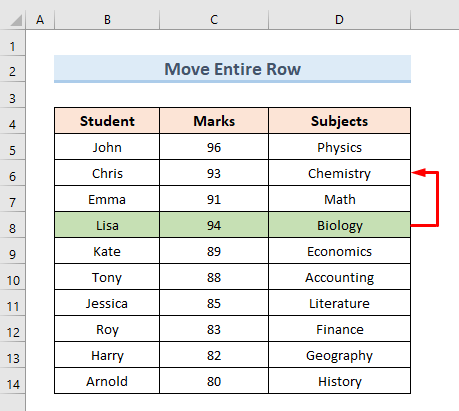
Assume I wish to relocate the highlighted row to the second row (near the headers) in the dataset below:
The steps are as follows:
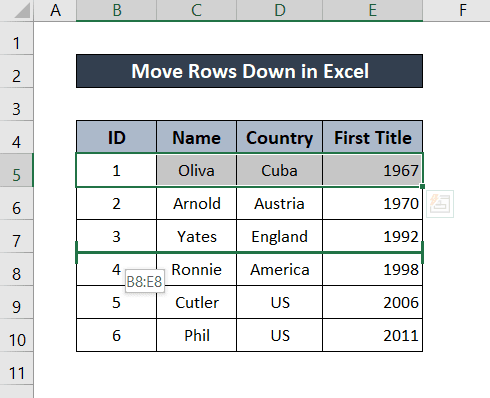
- Decide which row you wish to move.
- Keep pressing the Shift key on your keyboard.
- Your cursor should now be at the selection’s edge. The move icon, a four-directional arrow icon, would appear.
- While continuing to hold down the shift key, click on the edge (with the left mouse button).
- Place it in the row where you wish to relocate this row.
- When you see a bold line just beneath the row you wish to move, release the mouse button.
- Remember to hold down the Shift key all the way to the finish.
You can see in the video down below how to shift a row using this technique. Keep in mind that I simply relocated the chosen cells in this example. Selecting the entire row and then using the same actions will allow you to move the entire row.

Here are some critical details concerning this approach:
- You can shift adjacent rows (or a few of the adjacent rows’ cells). This approach does not permit moving non-contiguous rows. For instance, you cannot move rows #4 and #6 at the same time. However, by choosing it, you may shift rows 5 and 6 simultaneously.
- Using this technique, moving a few cells in a row or column won’t affect any other information in the worksheet. In the aforementioned example, any data outside of this table (i.e., above, below, or to the right, or to the left) is unaffected.

Move Columns in Excel
In Excel, moving columns is also possible using the same method.
- Decide the column (or adjacent columns) you wish to relocate.
- Keep pressing the Shift key on your keyboard.
- Your cursor should now be at the selection’s edge. The move icon, a four-directional arrow icon, would appear.
- While continuing to hold down the shift key, click on the edge (with the left mouse button).
- Place it in the column to which you wish to shift this row.
- When you see a bold line at the edge of the column where you wish to relocate this column, release the mouse button.
- Remember to hold down the Shift key all the way to the finish as you exit.