


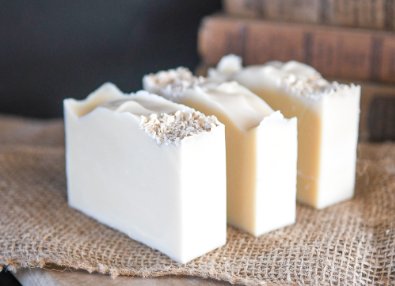
How to Make Goat Milk Soap – A helpful trick for achieving dazzling white bars is included in this straightforward recipe and directions for making goat milk soap. This easy-to-make, nourishing soap recipe is especially helpful for sensitive skin because of its creamy lather.
Goat milk is a popular ingredient among soapmakers for good reason. It produces incredibly soft, exquisitely creamy soap bars that are perfect for all skin types, especially those with sensitive skin. Goat milk soap can leave your skin feeling joyful and healthy when other soaps and washes feel too harsh. We produce goat milk soap since it is well-liked by both our loved ones and clients.
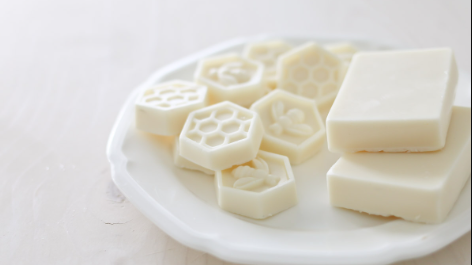
I’ve been using it intermittently for a few years, so I am aware of how difficult it may be to use at first. I’m giving you access to this recipe because of this. This is a recipe for natural cold-process goat milk soap that makes use of liquid goat milk and a straightforward method to guarantee creamy white finished bars. This is significant not only in terms of appearance but also because it prevents the milk from burning and producing an off-putting odor. Additionally, any additional essential oils or fragrance oils may clash with that aroma.

Also Read : How To Make All Cells The Same Size In Excel
How to Make Goats Milk Soap
Let’s start by discussing the things you will require
- To Measure Oils, Use Stock Pot Scale Bowls
- Tiny Glass Bowl for Measuring Lye: Use caution as it might corrode metal!
- Large glass bowl with spoon or spatula to combine lye and goat milk
- A thermometer
- Safety Gloves for Soap Mold and Stick Blenders
- Tiny Metal Strainer
The Components
Let’s now discuss the ingredients you’ll need.
- Ideal Goat Milk: Frozen in Cubes Lye Coconut Oil
- Fragrance Oil with Olive Oil
This is a recipe for cold process soap, which means that saponification takes place at a lower temperature to prevent the goat milk from becoming scorched. Whenever possible, try to have all of your materials ready before you begin. It will go more smoothly if you are more prepared because some of these steps happen quickly!

Blending Milk with Lye
It’s vital to note that handling lye should always be done with extreme caution because it can burn skin contact. Thus, make sure to don on protective gloves and goggles before handling your lye. Now, fill a tiny glass dish with precisely the right amount of lye. Since lye eats through plastic and corrodes metal, it is best to measure lye using glass instead of plastic. If you’ve never used a kitchen scale before, zero or “trace” the bowl on the scale. By doing this, the weight of the vessel you’re measuring into is eliminated. You can now begin measuring.
You can now measure out your frozen goat’s milk after measuring and setting aside your lye. For this chilly method, I strongly advise freezing your goat’s milk since it will prevent scorching or burning during the mixing/reaction with the lye. Of course, I freeze mine into smaller cubes for easier measuring.
After the milk and lye have been measured, you can begin combining them. Pour all of the frozen milk into a glass dish and stir in a small amount of the lye.
Make sure the reaction doesn’t reach more than 70 degrees by using your thermometer at the same moment. You are more than welcome to utilize an ice bath to assist in regulating the reaction’s temperature.
View below
You will notice the frozen milk starting to dissolve as you gradually whisk in little amounts of lye. Here, there’s no rush, so take your time mixing! As you continue to work through your lye, don’t forget to periodically check the temperature of your lye/milk mixture.
Including the Additional Oils
Measure out your oils and take your time between slowly combining your lye with your frozen milk. In a large stock pot, mix the coconut and olive oil straight. Simmer the oils on very low heat to ensure they are well blended if they haven’t melted yet. You might not need extra heat on a hot day!
Next, blend in the fragrance oil. Usually, I have a notepad close at hand for every oil in case someone mentions that it discolors or accelerates. Put aside.
Putting everything together
After combining all of the lye and milk and keeping the temperature below 70 degrees, filter the mixture using a tiny wire strainer. This aids in getting rid of any tiny bits of lye that didn’t dissolve completely.
It’s time to mix everything together now. Ensuring that the lye/milk mixture and the oils are within 10 degrees of each other is crucial for a successful saponification process. Now, fill the large stock pot with your oils and lye/milk mixture.
Blend all ingredients together on low speed using a stick blender. Above all, don’t add any more bubbles to your soap by keeping the blender toward the bottom. The thickening of the mixture that soap manufacturers refer to as a “thin trace” is what you are searching for. This is how incredibly thin pudding should be.
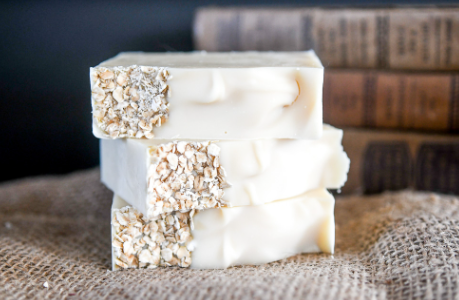
You can now add your fragrance oil. Mix together gently. Make sure you act fast to pour the mixture into your mold(s) if it begins to thicken and accelerate, much like pudding. A “thin trace” is the consistency you want to get; soap producers use this term to denote a thickening of the mixture. It has the consistency of very thin pudding. It’s time to add the scent oil now. Once more, mix things very gently on low speed with your stick blender. Make sure you act fast to pour the mixture into your mold(s) if it begins to thicken and accelerate, much like pudding.