


How to Build Wall Shelves – No matter where you live or what kind of style you choose, learning how to construct wall shelves will provide you with the unique chance to update your space and add useful storage for a fraction of the price of purchasing new furniture. Shelves are a simple method to showcase art, protect priceless china from damage, or just increase your overall storage capacity in your house. DIY floating shelf solutions are far more cost-effective than engaging an expert to design and construct bespoke wall shelves, which is unfortunate because hiring a professional may be expensive.
“Installing your own shelves might be a terrific way to save money on your home project,” says Mallory Micetich, an Angi home care specialist. “If you have the necessary equipment, enough time, and patience to install the shelves correctly, it’s a very straightforward job,” says Micetich. However, it’s always preferable to hunt for a lesson or pay for expert assistance if you lack any of the three. If you’re willing to take on the task and are prepared to increase your storage, continue reading for an overview of various shelving types, considerations, and typical hazards.


Also Read : How To Install Font On Crossover Mac
How to Build Wall Shelves
1. Blend Substances
Don’t be afraid to use different materials while constructing your shelves. Matching wood with metal is a subtle approach to mix the two; deeper wood stains go with darker metals, and lighter wood with lighter metal. Modular shelves are quite useful, according to Jessica Davis of Atelier Davis. She states, “The shelves are bamboo and white lacquered aluminum.” As they are modular, you have a lot of customization options. There’s much space for closed storage, which is crucial, and certain shelves are higher to accommodate paintings.
2. Shut Down Your Mounting Device
Use concealed metal supports placed to blocks behind the wall to conceal your shelf mounts for a simple, minimalistic aesthetic. Ammor Architecture’s Thomas Morbitzer points out that wall-to-wall shelving of this kind demands more expertise and suggests putting blocking behind the wall prior to plaster replacement. After that, locate the brackets carefully and slide the shelves on them, fastening them with a set screw.
3. Consider Prefabricated Shelves Serious Business
Such prefabricated shelf units (from CB2) save you from needing to utilize big power equipment like table saws and nail guns and are excellent first DIY projects. “These shelves are truly the ultimate DIY project since they need very little work,” explains IDCO Studio’s Anastasia Casey. We bought three wall-mounted shelves from CB2 and placed them 14 inches apart to improve the appearance. We screwed one screw into each vertical bar to secure the shelf units using drywall anchors. This results in the simplest do-it-yourself project for a renter or novice that has maximum effect without requiring the time or money commitment of standard built-ins.

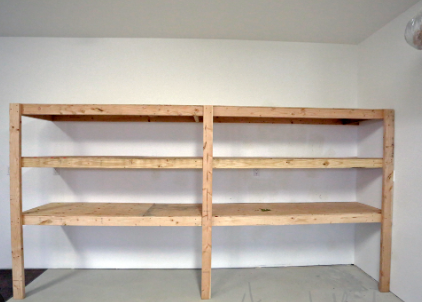
4. Disabling Elective Shelves
By mounting these wall-to-wall bookcases with just wall studs, Samantha Struck of StruckSured Interiors may spare you the trouble of adding blocking. Struck says that compared to others, these DIY wall shelves are easy to use. The 1x1s that span the length of the shelf’s back and sides serve as its bottom supports. They drill straight into the studs. After that, all you have to do is cut shelves out of any kind of wood—in this example, plywood with walnut veneer—and edgeband the front face to complete the look. Choose a solid wood piece instead of an edgebanding, but be aware that it will be heavier.
5. Use the Same Materials to Get a Modern Look
Bold and colorful shelving is not necessary for modern shelving. With books and artwork, you may add levels to shelving that seamlessly complements the surrounding area. “I enjoy adding art into bookshelves; it provides a chance to overlay pattern and color and give your style combinations a little height,” says Collected Interiors’ Ashley Macuga. Although there are many amazing places to find prints, if you’re feeling really artistic, grab a paintbrush and try creating some abstract art yourself. If you don’t already have the room, this kind of built-in shelving is more complicated and would take a weekend to finish.
6. Maximum is the Ceiling
When faced with a room that has high ceilings, McKenzy Golding of Goldenbird Design suggests seeing the space as a chance to add more storage by adding a library ladder and modular shelves, rather than seeing it as a challenging area to fill. Wall shelving may fulfill both form and function, according to Golding. Installing movable modular shelf to accommodate your existing accessories—such as artwork, books, or vessels—is what we advise. Should you have higher ceilings, we additionally adore putting in a library ladder. This will enable you to use your up-high shelf to its maximum potential.

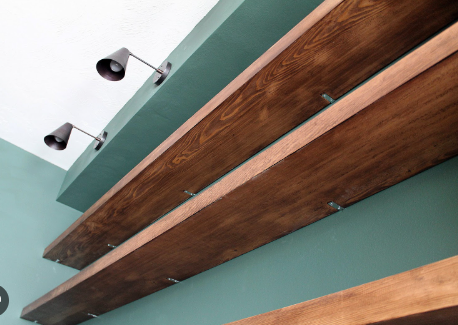
7. Enhance Typical Floating Shelves
Typical floating shelves are frequently flat, but you may add short vertical edges to the ends for a more conventional design if you’re looking for something more distinctive that doesn’t look plain. With some more materials and a miter saw, AB|DS can complete this easy modification. Just trim to the appropriate height, then fasten with finishing nails.
8. Display Your Items on Clear Shelves
Full disclosure: Building clear shelves from scratch at home is usually not possible. But buying and installing prefabricated pieces offers affordable, fashionable solutions for most space décor and a way around any intricate construction. These ones, created by Hattie Collins of Hattie Sparks Interiors, were the ideal way to highlight the vibrant children’s books in this nursery.
9. Utilize Current Spaces
Golding is a strong believer in creating storage solutions out of preexisting areas. Here, she created built-in storage out of wasted closet space. They split the enormous glass sliding closet door that was previously in the office in half to make built-in storage shelves. If you decide to take on this project alone, allow yourself at least four days as it involves some carpentry and the use of power tools.
10. Creating Your Own Floating Shelves Is Easy
Don’t worry if you’ve been putting off DIYing your own shelves because of the more intricate shelving inspiration. Stacking similar pieces of wood to generate visual interest is a simple design tip for floating shelves, like the ones seen above by Marea Clark Interiors. To hold them in place without drilling holes in the wall or adding blocking, you may also use shelf brackets.
11. Simple DIY Floating Shelves Are Possible
Don’t worry if the more intricate shelving ideas have scared you away from trying your hand at building your own shelves. An easy design tip that uses stacking similar pieces of wood to generate visual interest is to make simple floating shelves, like the ones seen above by Marea Clark Interiors. Even without drilling holes on the wall to add blocking, you may use shelf brackets to keep them in place.
12. Examine Alternatives for Storage
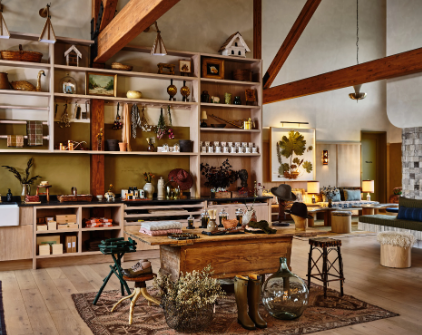
The signature look of Christie Ward & Staver Gray rooms is a worn-in, vintage vibe. In order to display a collection of ceramics, trinkets, and tea towels, the two decided to create shelves that looked like kitchen cabinets. “The open shelving helps to loosen up the space as we wanted to avoid something that felt like a heavy mass,” said Ward & Gray. For greater functionality, we built the lower shelves beneath the countertop to pull out, giving you additional counter space or a better place to arrange flowers. White wood makes up the shelves, and we utilized tumbled and honed Belgian bluestone on the countertop to give it an elongated appearance.

13. MDF Racking
You do not need to purchase your floating shelves if you would rather build your own. With MDF and your preferred wood, you can create your own bookshelves, much like the ones shown above by Four Brothers Design + Build. This arrangement takes around five days to create and calls for a higher skill set. It combines elmwood walnut cabinets with grain-matched walnut shelves.
14. Clamps and Brackets are Your Friends
Adding brackets to your floating shelves is a simple way to give them individuality and stability. Your possibilities are endless because they are available in an array of designs and colors. It’s advisable to pair them with other metal elements in the space or utilize them as a chance for contrast.
15. Use Wallpaper to Add Visual Interest
If you choose to be cautious and go with monochrome. Shelving that complements the surrounding area, think about adding wallpaper to your shelves to gently update their appearance. In this instance, Golding employs wallpaper to create visual intrigue and depth. “We suggest using a small-scale print to create dimension without overwhelming the area,” the spokesperson advises.