


How to Make a Fiberglass Mold – Fiberglass is a lightweight, strong material that is frequently used to build automobiles, boats, and even airplanes. Making a mold is required to make intricate fiberglass parts and components. It is possible to create several components with the same dimensions and shape by using a fiberglass mold repeatedly. We’ll talk about the procedures needed to create a fiberglass mold in this post.

Also Read : How To Make Garlic Parmesan Sauce
How to Make a Fiberglass Mold
1. Make a Model
Modeling the item or part you wish to make is the first stage in creating a fiberglass mold. Material options for the model include clay, foam, and wood. The model has to be an exact duplicate of the component you intend to manufacture in the end.
2. Use the Release Agent application.
After creating your model, you must coat the surface with a releasing agent. This will enable you to remove the fiberglass when it has cured and stop it from adhering to the model. It is possible to buy release agents made especially to work with fiberglass molds.
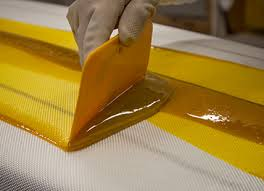
3. Put on Gel Coat
The model has to have a layer of gel coat applied in the next phase. Utilizing a colored resin, a gel coat gives the finished product a glossy, smooth finish. Using a paintbrush or spray gun, apply the gel coat, being sure to cover the model’s whole surface.

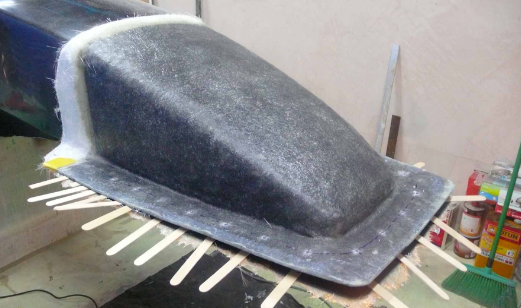
4. Put in a Fiberglass Mat
It’s time to install the fiberglass mat after the gel finish has dried. Tiny glass fibers bound together by a glue make up a fiberglass mat. Slice the mat into pieces that are just a little bit bigger than the model’s surface, then start putting the pieces to the model. Use enough resin to cover the mat completely so that it sticks to the model’s surface.
5. Put Down More Fiberglass Layers
You can apply more fiberglass layers until the required thickness is reached after the initial layer has dried. It is best to wait for each coat to dry completely before applying the next. To make a stronger mold, you might wish to utilize different kinds of fiberglass, including woven roving or chopped strand matting, as you apply more layers.
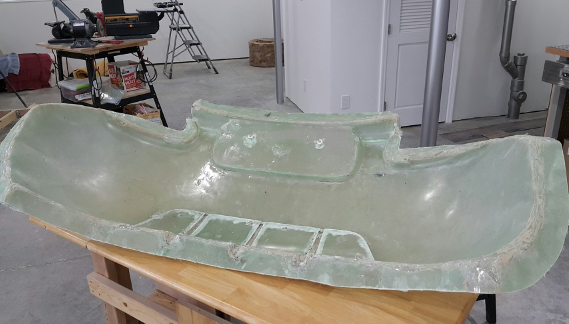
6. Take Out the Mold
You may take the mold out of the model once the last layer of fiberglass has dried. Gently take the mold off the model by carefully prying its edges away. You might need to apply a releasing agent to assist dislodge the mold if it’s trapped.
7. Cut the Mold
Following the mold removal process, use a saw or rotary tool to cut any extra fiberglass off the edges. Take cautious not to slice through the mold itself.
8. Apply the Release Agent’s Final Coat.
It is crucial to apply a last layer of release agent before utilizing the mold. By doing this, it will be possible to remove the fiberglass portion with ease and reuse the mold.
In conclusion, creating a fiberglass mold is a procedure that can be accomplished with repetition, but it does need some expertise and patience. These instructions will help you make a mold that is dependable and long-lasting so you can make fiberglass parts and components that are of excellent quality. Now that you have the proper equipment and supplies, you can begin creating your own molds.