


How to Set Clock on Samsung Range – Although it may seem like a small step, setting the clock on your Samsung range is important for your everyday cooking routine. Setting the time is crucial for the following three reasons:
- Accurate Cooking Time
You can make sure that all of your Samsung range’s timers, pre-sets, and cooking features work properly by setting the clock accurately. As a result, you can depend on the range to accurately indicate cooking times, guaranteeing consistently flawlessly cooked food. - Synchronization with Other equipment
A central clock system synchronizes several of the equipment found in contemporary kitchens, including ovens and microwaves. By putting the clock on your Samsung range, you can get it to synchronize with other appliances, which simplifies cooking task management and guarantees that all appliances are operating together harmoniously. - Safety measures
Timed shut-off timers and kid locks are two examples of the safety measures that come with several Samsung models. Not only do these features improve cooking safety, but they also depend on a precisely set clock to work. You may take use of these safety measures and cook with confidence by setting the clock on your range.

To optimize your cooking process and boost your overall kitchen efficiency, it’s crucial to set the clock on your Samsung range, regardless of whether you’re a keen entertainer, a busy mom juggling several responsibilities, or an ambitious home chef. Now that you know how important it is to set the time, let’s look at how to go to your Samsung range’s clock settings.
Also Read : How To Set Steam Inventory To Public
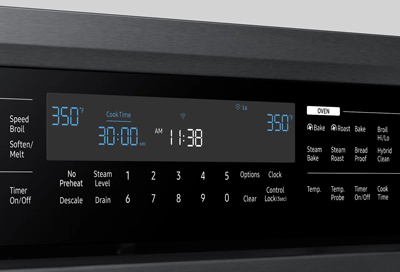
Setting the Clock on a Samsung Range
It’s time to adjust the clock now that you have reached your Samsung range’s clock settings menu. To be sure that your clock is correct, just follow these easy steps:

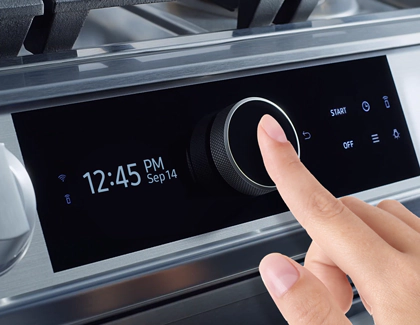
Step 1, Use the Arrow Buttons or Touch Controls
To move through the clock settings, you may use the arrow buttons or touch controls, depending on your range model. To choose the relevant choices, use the touch screen or the up and down arrows.
Step 2, Define the Hour
Set the hour to start. To change the hour that is shown on the screen, use the touch controls or the arrow buttons. For precise time setting, pay attention to the AM and PM indications.
Step 3, Set the Minutes
Proceed to set the minutes subsequent to the hour. Once again, you may modify the minutes shown on the screen by using the touch controls or arrow buttons. To guarantee accurate timekeeping, take your time while setting the correct minute.

Step 4, Verify the Setting
After adjusting the minutes and hour, verify the setting. To save your clock settings, click the “Enter” button or adhere to the on-screen instructions. The new time will now appear on the display panel.
Step 5, Verify the Accuracy
After adjusting the time, look at the time on the control panel of the range. To make sure it’s accurate, compare it to the current time. As necessary, change the clock’s settings to ensure that the time is accurate.
You can quickly set the clock on your Samsung range and guarantee precise timing while cooking by following these instructions. But if something goes wrong or you have problems with the procedure, check out the troubleshooting advice in the next section.