


How to Screen Record on iPhone 14 – It may be extremely helpful to perform a lesson or demonstrate to a friend how to carry out specific activities in an Apple iPhone 14 by recording the screen of your mobile/cell phone Apple iPhone 14 in a video with sound, saving it in a video file, and then sending it or uploading it to a platform like YouTube or social networks.
A TikTok video, a phone call, or a video call (FaceTime) with a family member are examples of things we would want to capture on video with sound sometimes. We might do this as a memento or as proof.

Follow these steps to record this on your Apple iPhone 14:
If, on the other hand, you’d like to take a screenshot of your iPhone 14 as a single image rather than a movie, click the link below and adhere to the instructions on how to do so.
Also Read : How To Appear Offline On Instagram
Step 1,
Our iPhone 14 must first have screen recording turned on. Step 5 is available if it has previously been activated. On our Apple iPhone 14’s home screen, a gear symbol serves as a representation for the “Settings” program, which we may access to check.
Step 2,
Once we have located the “Control Center” option in the menu on the left, we click on it and then “Customize controls.”

Step 3,
In the “INCLUDE” part of the first list on our iPhone 14 if we already have the screen recording control enabled. We can adjust the order in which it appears by clicking on the three horizontal lines to the right of the control and dragging up or down. By clicking on the red button on the left, we may also take away the control.
Step 4,
If the active control is not visible, scroll down until it does and click the green “+” button next to the “Add to panel” symbol. We may now leave the Apple iPhone 14’s settings after completing this procedure.
Step 5,
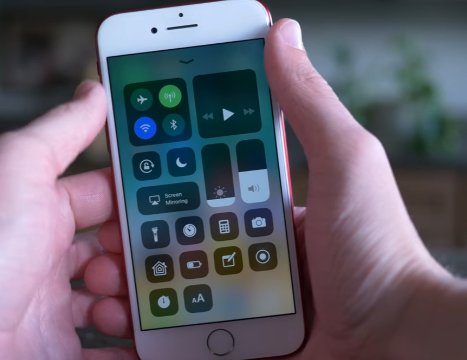
(iPad with iOS 11 or earlier and iPhone models 7 and below) Swipe upward from the bottom of the screen where you wish to start the video. (iPhone X, iPad running iPadOS or iOS 12) Swipe downward from the upper right corner of the screen where you want the video to begin.
Step 6,
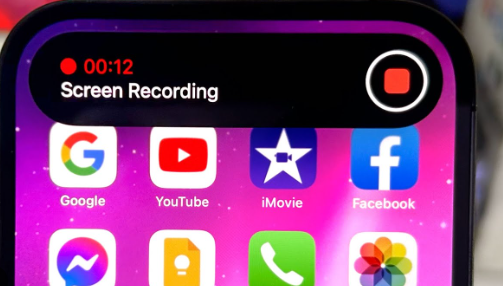
A 3-second countdown will start when you press the recording icon on the Apple iPhone 14 to start recording a video without using the microphone. A red line and the word “Recording” will appear at the top of the screen to let you know that everything you see is being recorded.
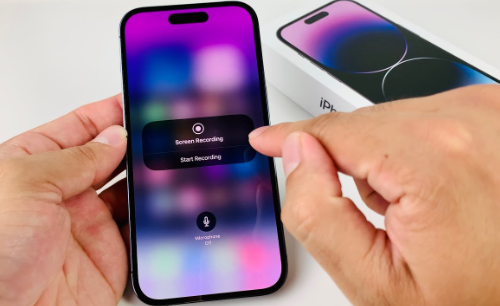
Press and hold the Record screen icon, click the microphone to turn it on or off, and then select “Start recording.” A 3-second countdown will start, after which the recording will start, if you want to record a video using the microphone in addition to the iPhone 14’s built-in sound (this is useful, for example, to explain the operation of an app to a friend or to record a message while recording the video from the Apple iPhone 14 screen).
Step 7,
You may either access the Control Center (Step 5 of this guide) and choose the Recording screen icon to stop recording or you can select “Stop” by clicking on the red line in the status bar at the top of the screen.
Step 8,
The screen recording footage has been stored to “Photos,” which was formerly known as the Camera Roll, according to a notice that will show up at the top of your Apple iPhone 14 screen.
Go to the Photos program and choose the final photo to view and share the video you recorded of your Apple iPhone 14’s screen.