


How to Repot Aloe Vera Plant – Repotting a plant can be quite upsetting for some individuals, for whatever reason, for both the plant and the person doing it. There can be some terror associated with the thought of physically removing a plant from its pot, prodding the girdled roots from what might appear to be a huge rat’s nest, and clipping damaged or extended leaves.
Repotting a plant that genuinely needs it is, in all honesty, a much better idea in the long run than leaving it in the little pot it has outgrown. When a plant outgrows its container, it is said to be pot bound. When this happens, the plant is stressed out about getting adequate water and nutrients because there isn’t enough healthy soil to maintain it overall. Insects and illnesses love to prey on stressed plants.
A plant’s ability to grow will be altered for the duration of its life by the amount of stress it experiences. Here are some pointers for repetting aloe vera. Several of the ideas are also readily applicable to other cacti and succulents.

Also Read : How to Remove Acrylic Paint from Fabric Step by Step !
How to Repot Aloe Vera Plant
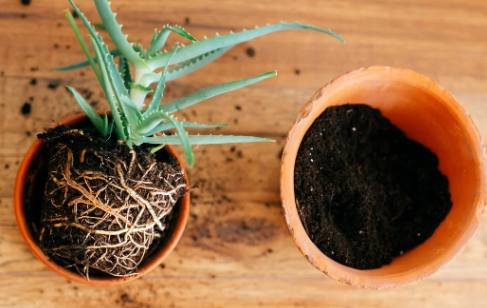
1. Choose the Appropriate Pot Size
Any houseplant repotting requires careful consideration of container size. Generally speaking, you would choose a pot that is one size larger than your aloe plant’s existing pot if your space permits it to grow larger. Therefore, the next size up in pots is4″, if you purchased a tiny2″ pot of aloe.
You can repot your aloe in a pot that is the same size as the original pot if you don’t have enough room for it to grow. But, before replanting in the same diameter pot, you will need to prune some of the roots as well as the leaves.
Although it could seem tempting, avoid putting your aloe in a big pot. An aloe plant’s structure and health can rapidly deteriorate in an overly large pot. Plants in overly large pots frequently start to spread out and lose structural integrity. The likelihood of the leaves and stem bending and breaking will increase as a result. Oversized containers can accommodate more potting soil than what is necessary for the aloe plant. Since aloe prefers well-drained, drier soil, more soil can store more water, and overwatering damage and root rot can occur quickly.
Consider growing several aloe vera plants in a pot if you locate one that is too big for just one. The likelihood of the soil becoming overly wet is reduced because all of the plants will want water. This is because there are more plants in that tiny space that need water to survive. Having several plants in one pot also makes the container appear fuller overall. It will also have a more pleasing appearance.

2. Choose the Appropriate Planting Medium
Aloe vera prefers soil that drains easily. Using a professional potting soil mix is the most effective technique to achieve a desired soil profile. Soils made especially for succulents and cacti are available.
These soils for cacti and succulents contain a mix of biodegradable components that offer nutrients and a little amount of water retention capability. This part of the mixture typically contains materials such as compost, humus, peat moss, or composted manures.
The next ingredient in the soilless mix is a big, inorganic particle that will facilitate excellent drainage. Common components for the pore space component include sand, pumice, and perlite, or a mix of the three.
Wet your potting mix before repotting your plant when it’s time to give your aloe and other houseplants a new home. Natural hydrophobic materials, such as peat moss, reject water. Water will flow off the peat moss rather than serving as a reservoir for the plant unless you moisten it beforehand. As a result, the plant is unable to absorb the water. Just fill a small plastic tub with your potting mix and warm water. Next, start kneading the earth like dough. This allows the water to seep into the peat moss.

3. Drainage
There is no way your new pot can be made without drainage holes in the bottom. If not, water will build up inside the pot. The plant’s root will then start to drown, which will ultimately lead to rotten roots and plant death.
A couple things will work at the bottom of your pot to prevent soil from escaping the drainage holes when you water it. Water can escape while soil is retained if you place objects in the bottom of the pot over the drainage holes, like a little piece of window screen, shards from shattered pots, or stones.
If your aloe is tiny enough, you should water it in the sink. In this manner, extra water can be drained out after thorough watering. Another way to hydrate your aloe vera is using a saucer. In addition to serving as a water reservoir for the plant, the saucer will prevent water from spilling onto carpet, window sills, or furniture. Once the entire soil profile has been saturated, dispose of any leftover water in the saucer.


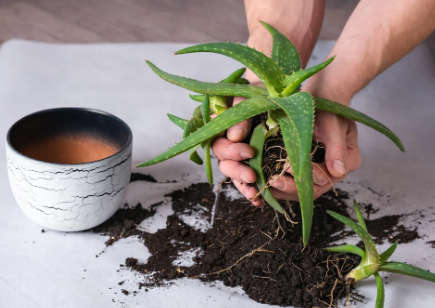
4. How to Repot Aloe Vera Plant: Real Repotting
- Start by turning your aloe vera plant upside down.
- If needed, carefully move the old pot back and forth while removing it. Put the old pot away.
- Turn your aloe plant over and study the root structure.
- Pulling the roots apart gently will help separate them if they are extremely knotted.
- If the roots are extremely tight, you might need to make vertical slices into the root ball with a clean set of pruners, a pocket knife, or other clean, sharp gardening tools in order to assist release the roots. After that, carefully pry open the roots, making sure to leave as much soil on the roots as you can.
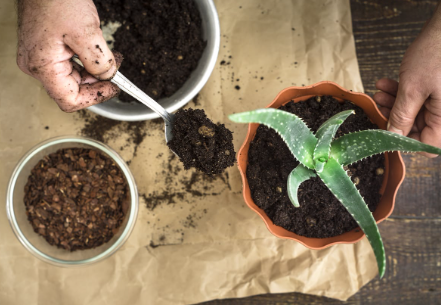
- Choose your preferred material to fill the drainage hole in your freshly cleaned container (pebbles, shard of shattered pottery, window screening)
- Add a thin layer of moistened potting mix to the pot, about 2 inches deep.
- To measure the planting depth, place your aloe plant inside the pot with its roots down.
- Take off a portion of the 2″ of bottom soil if the previous soil line is higher than the container.
- Add more potting mix to the pot if the plant is too low.
- Once the ideal planting depth has been achieved, replant your aloe plant in the new container, root side down.
- Start adding more moist potting mix to the pot’s backfill.
- To settle the soil around the plant roots, lightly tap the pot on the work surface.
- A ½” head space should be left at the top of the pot for watering.
- Gently compact the earth around the roots.
- It’s acceptable if some of the dirt settles.
- Should you need more dirt, you can add more.
- The plant will become more stable in its new pot thanks to this soil tamping down.
5. Water Completely
Make sure to give your aloe plant plenty of water after you’ve finished potting it up in its new pot. It is important to ensure that the roots and soil are in direct contact.You can also use your fingertips to press down on the moist soil. In addition to helping your aloe adjust to its new pot and soil, this watering will lessen any transplant shock it may experience.
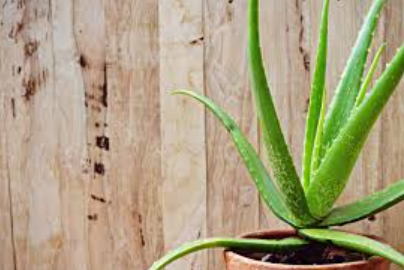
6. Return to the Original Position
Relocate your aloe plant to its original spot—under the same window, on the same table, etc. Your plant may become stressed if you move it to a new location with variable lighting or other environmental conditions because it is already acclimating to its new pot.
7. How to Repot Aloe Vera Plant: Conclusion
Repotting need not be frightening. It’s an essential step in maintaining the health of your aloe vera. Any mistakes can be readily fixed with little damage if the right pot, soil, drainage, and potting depth are used. In the unlikely event that you make a mistake, your aloe is incredibly understanding and will continue to grow as a thank you for your time and work.