


How to Make a Wet Pallete – Since I’ve become more and more interested in miniature modeling and painting for tabletop games over the past few years, I’ve been trying to improve my painting skills by watching a lot of painting tutorials, learning about the tools and techniques pros use, and organizing my workspace to make the most of the time I can devote to my hobby (time is always limited).
Getting a single, high-quality sable brush (and knowing how to clean and use it properly), diluting my paints using a matte medium/water mix, and—the topic of this how-to—using a wet palette are the three tools/techniques that have improved my painting the most.
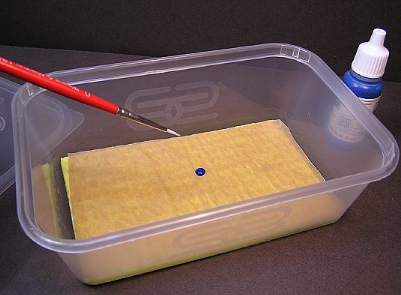
It sounds exactly like what it is—a wet palette. Inside an airtight container is a wet paint palette paper that is resting on a sponge-like substance. There are various uses for a wet palette. Your paints will stay thinner if you use damp palette paper. Applying several thin layers of paint is what’s recommended for miniature painting. You may do that by using a wet palette and mixing in a matte material. You can also achieve better color blending results by using the wet palette.

Also Read : How To Grow Sugar Beets
How to Make a Wet Pallete
Acrylic paints for gaming and commercial scale models are likewise very costly. And on a figure, you hardly ever use that much. This may cause your palette to run out of paint very quickly. You can save your thinned paints and specially blended colors for your next painting session by keeping a wet palette in an airtight container. Paints kept in a well-sealed palette will keep for several days, if not a week.
Commercial wet palettes are available for about $15. You’ll need to spend an additional $15–20 on a pack of palette paper and another replacement sponge. Fortunately, though, you can construct your own wet palette for as little as $6. This is the method.
The three main parts of your wet palette are the palette paper, the moisture sponge, and the airtight palette container.
The Jar
An airtight plastic container is what you desire. Some folks prefer hinged lids on their palettes. I prefer a lid that is fully removable. The dimensions of your container might also help you determine the size of your palette. My original 7-1/2 by 9-inch Masterson Sta-Wet commercial palette. I opted for a smaller container that measures 5 inches by 7 inches in order to save up some work space because I almost ever used half of that area. On Amazon, I paid $8 for a pack of two Snapware storage containers.
If I could do it over, I would make sure that my container’s corners are not as rounded so that I wouldn’t need to trim the paper and sponge. I developed a template the size and shape I needed and marked it as such so I wouldn’t use it by mistake. This will make it easy for me to make replacement sponges and palette paper in the future.

The Sponge
I paid $1 for a bag of three 7 x 8 “sponge cloths” on Amazon to use as a water storage sponge. For this use, the thickness and construction of this material are ideal. And for a dollar, it’s definitely better than $7.50 for the Masterson new sponge.
The Paper Palette
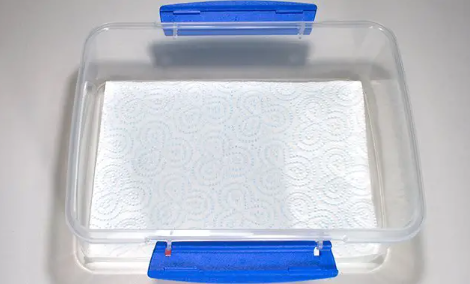
The thick palette paper included with the Masteron Sta-Wet Palette is made to handle a lot of acrylic paint for painting canvases and other projects that call for a lot of paint. Painting miniatures is not the best use for it. Most artists use baking parchment for that purpose to make their own wet palettes. Reynold’s Kitchen Parchment with SmartGrid is the baking parchment paper that I like. The grid on the back of this extremely thin parchment paper makes it incredibly simple to cut to the desired size.
How to Make a Wet Pallete: Assembling It
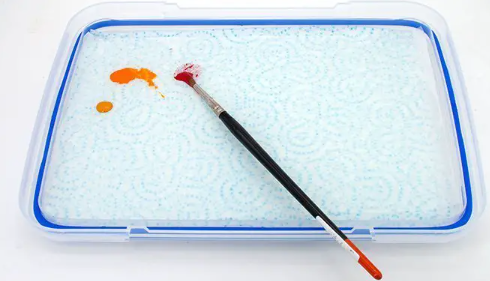
After assembling your parts, you should thoroughly wash the container in hot, soapy water. Additionally, you should immerse the sponge in boiling water to get rid of any contaminants and microorganisms that could lead to the mold growth on your palate. After the sponge cools, remove its excess water by wringing it out and soaking it in cold water. Don’t want it to be completely drenched. After soaking it in water for ten minutes or so, lay the parchment paper over the sponge in the container and smooth it down. I always use distilled water in my palette to further verify that there are no pollutants in my paints.
And that’s it! It’s now time to put your wet palette to use. I wring out the sponge, clean the container in hot, soapy water, and rewet the sponge every three to four days to maintain. This will stop mold from growing.
People creating their own wet palettes may be seen in a number of YouTube videos. This is a common one. One great trick that is offered here is to cut your palette paper roll to fit the width of your container. This way, when you replace the paper, all you have to do is peel off the necessary length.
Painting using a wet palette has greatly influenced my work. Here are some examples of the kind of work I’m doing with it: a 28mm Skaven ratman from Blood Bowl, a couple of my 28mm Frostgrave miniatures, and a stand of 15mm doughboys for the science fiction miniatures game All Quiet on the Martian Front.